The Pre-Test Setup – often forgotten but so important!
In many cases, companies don’t have an in-house EMI test lab and have to travel for hours to find an open lab that meets their needs. Some larger companies have in-house labs, but they are often swamped and may be difficult to schedule. At the end of the day, lab time is costly and it’s important that you make your time in the EMI lab count!
After months of design, assembly and integration, deadlines approach. Your ‘green-light’ product development schedule is a distant memory and as an engineer, it’s all you can do to get the hardware working, schedule a lab, and ….go!
But…. STOP! As an EMI lab manger I’ve seen it all too often – Incredible as it may seem, electronic systems are often fully integrated for the first time when they are set up for EMI! Sometimes days are wasted unboxing hardware, trying to install cables and connectors, and getting the system working while in the lab. And sometimes, it doesn’t go well.
Set it up before you go!
Before leaving for the lab, remove your entire system from the engineering development bench and set it up as you would in an EMI lab.
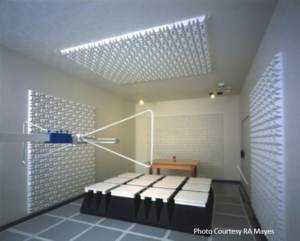
One company I worked for had an unused EMI test chamber that was mostly used for storage when I arrived. That was an opportunity for me to establish a pre-test setup process, which saved countless headaches when I ultimately reached the outside lab. Here are some of the highlights:
Place your hardware on a test bench – just as if it was in a lab.
For MIL-STD and Aerospace EMI tests, that usually means a conductive bench. That may be the first time that all hardware is ‘tied-together’ to a common ground. This not only helps resolving issues like unforeseen ground loops, but will give you an opportunity to check your hardware bonding. Remember that MIL-STD and Aerospace EMI tests usually require bonding to the conductive bench to simulate the actual application, so if there are special fixtures needed to bond your hardware to a vehicle frame, now’s the time to use them and try them out. This is the time to get out that 4-probe ‘Bonding’ milliOhm meter to make sure that the hardware meets the bonding requirements. Measure from each box to the conductive surface, then across each critical interface. This will keep you from being surprised by an errant paint job or missing/ill-fitting hardware. Commercial companies will want to set up the equipment on an equipment cart similar in size to one provided by the lab. (Find and …) Install all peripherals and loopback connectors, making sure there’s room on the cart.
Connect each test cable as it will be connected in the lab.
Again, MIL-STD and Aerospace companies will want to check connector to box and cable shield to connector bonding. Know the lab’s bench size and layout, and make sure that the cables can be run along the front of the bench as required in the test procedure. Commercial companies will want to connect all interface cables leading to peripherals or loopbacks. Don’t guess that the lab will have a particular cable – even if it’s common. It’s good to bring all cables with you!
Simulate each interface cable’s path through the chamber wall.
For MIL-STD and Aerospace tests, I always recommend using filter pin connectors or fully shielded cables when penetrating a chamber wall. Use both if you can get away with it. To make the transition to a lab easier, it’s best to establish a ‘standard’ cable penetration panel and use it in your pre-test setup. Ground the cable shields (usually through the penetration panel) to the common bench top ground, providing a path for the shunt capacitors in the filter connectors. It’s better to know that an interface will have issues with shunt capacitance before you set up for the final test!
LISN’s/LSC’s/ISN’s etc…
Be aware that power inputs will be attached to Line Impedance Stabilization Networks (or LISN’s) when under test. I was lucky when I inherited the unused lab – it had a nice set of LISN’s already in it. Put them in place in your power lines to make sure that your system will power up properly.
Power up and operate your system – after it’s set up.
Software and functional testing are often the biggest problem when you first arrive at the lab, and finding problems before you go is often the biggest potential time saver! Go through the functional test just like it’s planned in the test procedure. I have all too often heard the words that “it was supposed to operate that way….” right after the equipment was powered on. Don’t guess – try it. Remember that some EMI scans can take a long time. Take equipment heating and duty cycles into consideration. Also, EMI tests will want to have everything running at the same time, with fast cycle times. This reduces susceptibility/immunity cycle times and allows for better observation of emissions. Hopefully, properly designed EMI test software has been created by this time in the design cycle! In any case, run the box before you go!
Pack it and Ship it!
I’ve seen companies with very complex setups install their equipment on a test bench in their development labs – and then ship the entire bench (including EUT, Cables & all) to the lab! What a great idea!
So unless you’re that company, take good photos, label everything, carefully place all your equipment in boxes and ship. The same folks that were a part of the pretest setup should be at the lab when the equipment arrives!
One advantage I had when using this approach is that I used the old EMI chamber (and its bench) to ‘store’ the test cables, loads and other miscellaneous bits and pieces when I received them. I was able to slowly build up the test setup until the day the high value hardware arrived.
Take it from someone that’s seen it. If you do nothing else, do this.